6 Dollars and 20 minutes later... (and my first tutorial!)
...she had three baby hats!

I wanted to get Judah a plain, white baby hat to go along with his halloween costume. Sadly, I couldn't find any that would fit his...um... generous noggin. I decided to make one, but quickly realized that with just one small women's shirt, you can actually make three hats. I bought my white shirt a kmart, because I had to run in there for something else, but this could just as easily be done with something you don't wear anymore or something thrifted for much cheaper. (And if your baby has a smaller head, or you have a larger shirt, you could probably get more than 3 hats.) Here's what I did:
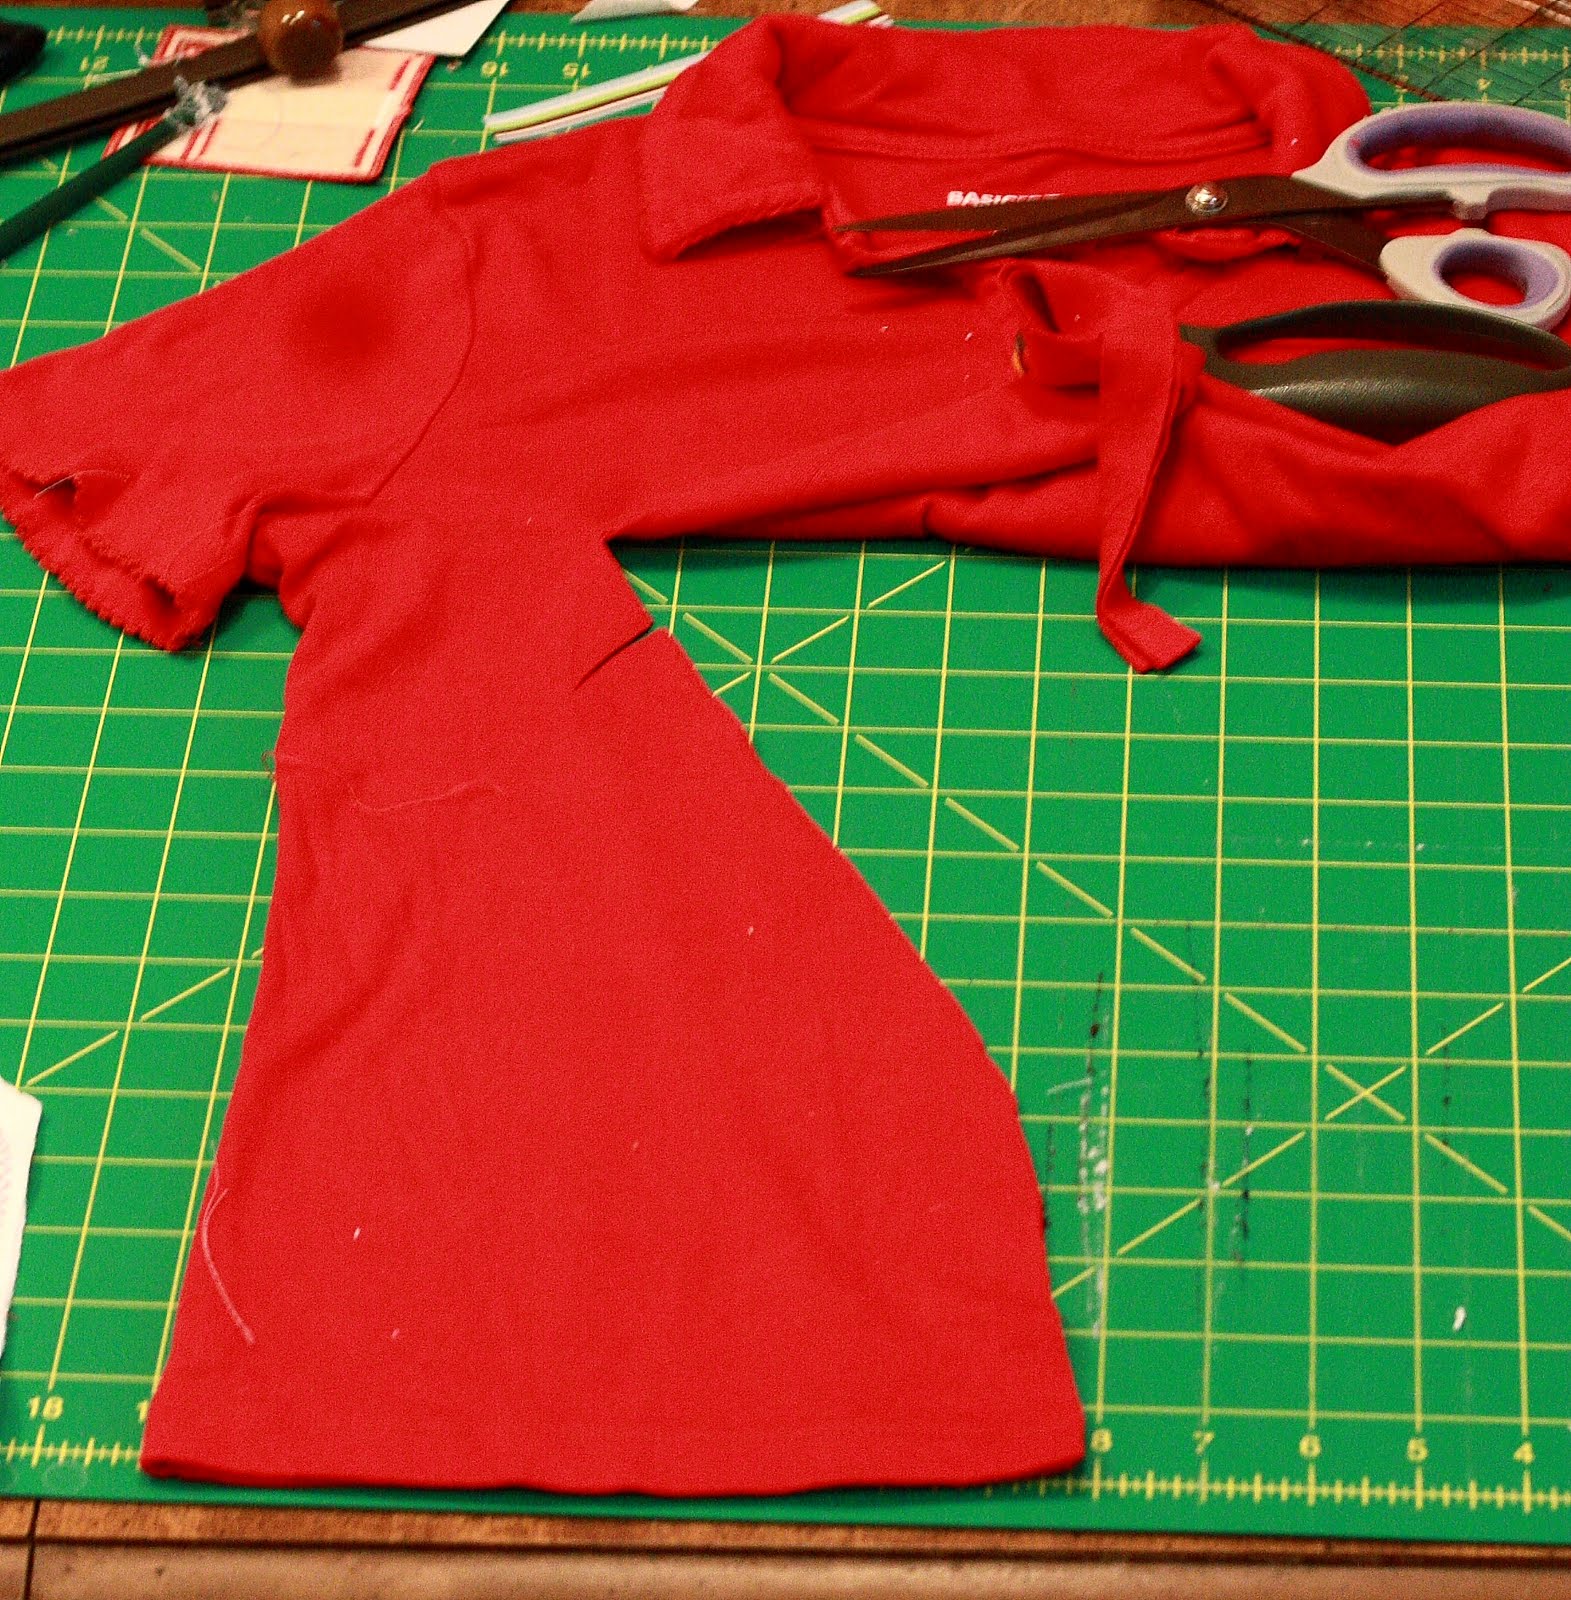
First, I measured Judah's head. It's about 18 in. around. So I cut a rectangle out of the shirt that was 8 in. wide (18 / 2 = 9, - 1 so that it will not fall off) by about 7 or 8 in high. I used the side seam of the shirt as one of the sides of the hat so there was less to sew. I cut the rectangle from to bottom seam of the shirt because that meant no hemming. [I hate hemming.]
(This is not a white shirt. When I made the three white hats, I didn't take any photos. So after the first batch, I dug around and found this shirt which was in my donate pile. Hence the red. I decided that since we have such mild winters here, though, it would be good to have some light weight hats for him to wear.)

(And from the picture here it looks like this is 9 inches across. But when I tried the hat on Judah, it was too big, so I went back and re-sewed it smaller. The final hat was 8.25 or so inches across.)

Put the right sides of the fabric together, then sew up the one open side and along the top. I used a zig-zag stitch because everyone says that's what to use when sewing with knits.

(Here we are, about the start with the two hems lined up right sides facing.)

(Sewing across the top...)
Now you can leave this hat as a rectangle and it works just fine. This is the tutorial I was looking at when first starting, and she just left hers as rectangles, and the hat is both functional and cute. You can turn it inside out and there you have it - a super easy, cute hat! Just try it on the baby, and if it is too big, then just re-sew up one of the side seams to make it smaller.

I made all three hats a little different. The first one I just sewed a scoop into the top portion, to make it look a little bit like ears, like this:

The second one I made long and pointed. To do this I cut up a little ways on the bottom hem of the shirt before starting to angle over.

Then I folded this in half so that the hat would be mostly symmetric, and cut down the other side until I reached the other side hem.


Then I turned it right sides together and sewed up one side and down the other, just like with the first hat. And there you have hat #2. For hat #3, I just cut off both sleeves, then cut them open along the seams.

Then you have two pieces that look like this:

Just cut off the narrow part on each side, leaving two pieces that are about 8 inches across.

Just sew around the edges, and you have hat #3!
And here they are, on my adorable model:
The pointy-eared hat

What I'll call the elf hat (which may be in need of a green pom-pom on the end for Christmas):

And the plain, round hat:

So go out there and make some hats, people!

I wanted to get Judah a plain, white baby hat to go along with his halloween costume. Sadly, I couldn't find any that would fit his...um... generous noggin. I decided to make one, but quickly realized that with just one small women's shirt, you can actually make three hats. I bought my white shirt a kmart, because I had to run in there for something else, but this could just as easily be done with something you don't wear anymore or something thrifted for much cheaper. (And if your baby has a smaller head, or you have a larger shirt, you could probably get more than 3 hats.) Here's what I did:
First, I measured Judah's head. It's about 18 in. around. So I cut a rectangle out of the shirt that was 8 in. wide (18 / 2 = 9, - 1 so that it will not fall off) by about 7 or 8 in high. I used the side seam of the shirt as one of the sides of the hat so there was less to sew. I cut the rectangle from to bottom seam of the shirt because that meant no hemming. [I hate hemming.]
(This is not a white shirt. When I made the three white hats, I didn't take any photos. So after the first batch, I dug around and found this shirt which was in my donate pile. Hence the red. I decided that since we have such mild winters here, though, it would be good to have some light weight hats for him to wear.)

(And from the picture here it looks like this is 9 inches across. But when I tried the hat on Judah, it was too big, so I went back and re-sewed it smaller. The final hat was 8.25 or so inches across.)

Put the right sides of the fabric together, then sew up the one open side and along the top. I used a zig-zag stitch because everyone says that's what to use when sewing with knits.

(Here we are, about the start with the two hems lined up right sides facing.)

(Sewing across the top...)
Now you can leave this hat as a rectangle and it works just fine. This is the tutorial I was looking at when first starting, and she just left hers as rectangles, and the hat is both functional and cute. You can turn it inside out and there you have it - a super easy, cute hat! Just try it on the baby, and if it is too big, then just re-sew up one of the side seams to make it smaller.

I made all three hats a little different. The first one I just sewed a scoop into the top portion, to make it look a little bit like ears, like this:

The second one I made long and pointed. To do this I cut up a little ways on the bottom hem of the shirt before starting to angle over.
Then I folded this in half so that the hat would be mostly symmetric, and cut down the other side until I reached the other side hem.


Then I turned it right sides together and sewed up one side and down the other, just like with the first hat. And there you have hat #2. For hat #3, I just cut off both sleeves, then cut them open along the seams.

Then you have two pieces that look like this:

Just cut off the narrow part on each side, leaving two pieces that are about 8 inches across.

Just sew around the edges, and you have hat #3!
And here they are, on my adorable model:
The pointy-eared hat

What I'll call the elf hat (which may be in need of a green pom-pom on the end for Christmas):

And the plain, round hat:

So go out there and make some hats, people!


Comments